Installation Guide
KnuckleHead Rooftop Support System
Regardless of the design, all KnuckleHeads utilize the same Universal Base and can be installed in one of three ways:
- They may be loose-laid.
- For a more secure installation, they may be bonded directly to the roof surface using GREEN LINK Adhesive/Sealant.
- Where high winds or seismic activity are prevalent, KnuckleHeads may be installed using both GREEN LINK Adhesive/Sealant and mechanical fasteners.
STEP ONE
LAYOUT THE ASSEMBLY
Use a marker to indicate the location of all Universal Bases, when bonding the base with GREEN LINK Adhesive/Sealant, which is optional.
STEP TWO
SURFACE PREPARATION
Using a solvent such as rubbing alcohol, clean the application area, removing dirt and oil.
NOTE: If loose laying the bases, then no cleaning is required. Set base into KnucklePad (OPTIONAL) and proceed to STEP 6

STEP THREE (optional)
APPLICATION OF ADHESIVE/SEALANT
If bonding the base to the roof membrane, apply GREEN LINK Adhesive/Sealant to the bottom of the Universal Base. Using a notch trowel, comb the entire surface leaving a uniform, approximately 60-mil layer of GREEN LINK Adhesive/Sealant.
STEP FOUR (optional)
PLACEMENT OF THE BASE
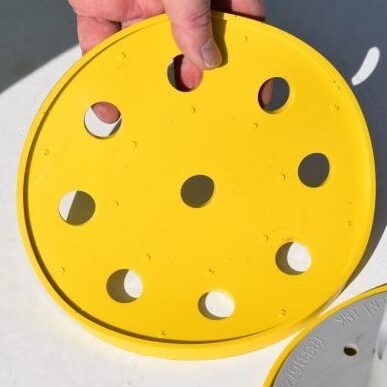
Position the base in the marked area and press gently. GREEN LINK Adhesive/Sealant should squeeze out from the “rivet holes.”
STEP FIVE (optional)
MECHANICAL ATTACHMENT
If also mechanically attaching the Universal Base to the deck, engage the appropriate fastener into the deck. (KnucklePads are not utilized when mechanically attaching base). Apply GREEN LINK Adhesive/Sealant to the fastener head to prevent leaking.
STEP SIX (optional)
INSTALLING EXTENSIONS
If the installation is to be elevated, slide the appropriate extensions into the base.
STEP SEVEN
INSTALLING THE HEAD
Mate the KnuckleHead to the base (or extension) and level, if necessary. NOTE: Rotate the head to the desired height, but do not elevate above the “stop” mark, which can compromise the integrity of the KnuckleHead unit.
NOTE: Rotate the head to the desired height, but do not elevate above the “stop” mark, which can compromise the integrity of the KnuckleHead unit.

STEP EIGHT
PLACEMENT OF STRUT, PIPE OR PAVER
Set strut, pipe, or paver onto the head, when using a metal strut, apply GREEN LINK Adhesive/Sealant to the strut head (optional) and press into place. NOTE: If setting pavers, a GREEN LINK anti-vibration PaverPad can be set on the head.
NOTE: If setting pavers, a GREEN LINK anti-vibration PaverPad can be set on the head.

STEP NINE
SECURING THE PLACEMENT
KnuckleStraps and KnuckleCaps install using standard stainless steel sheet metal screws (included).
KnuckleHeads are tough, molded fiberglass-reinforced nylon rooftop supports designed to keep equipment elevated to extend your roof’s life and protect your investment.
KnuckleHeads are height-adjustable, can support up to 600 lbs. each, and have undergone 10 years of exposure in the field without showing signs of weathering or deterioration. Five KnuckleHead designs are available depending on the application. Regardless of the design, all KnuckleHeads utilize the same Universal Base and install using the same basic steps. They can be loose laid, bonded using GREEN LINK Adhesive/Sealant or GREEN LINK Adhesive/Sealant combined with mechanical fasteners.
